Family Dentistry

Cosmetic Dentistry: Cosmetic & Emergency Dentist San Pablo CA | Veneers & Smile Repair | Allied Dentistry
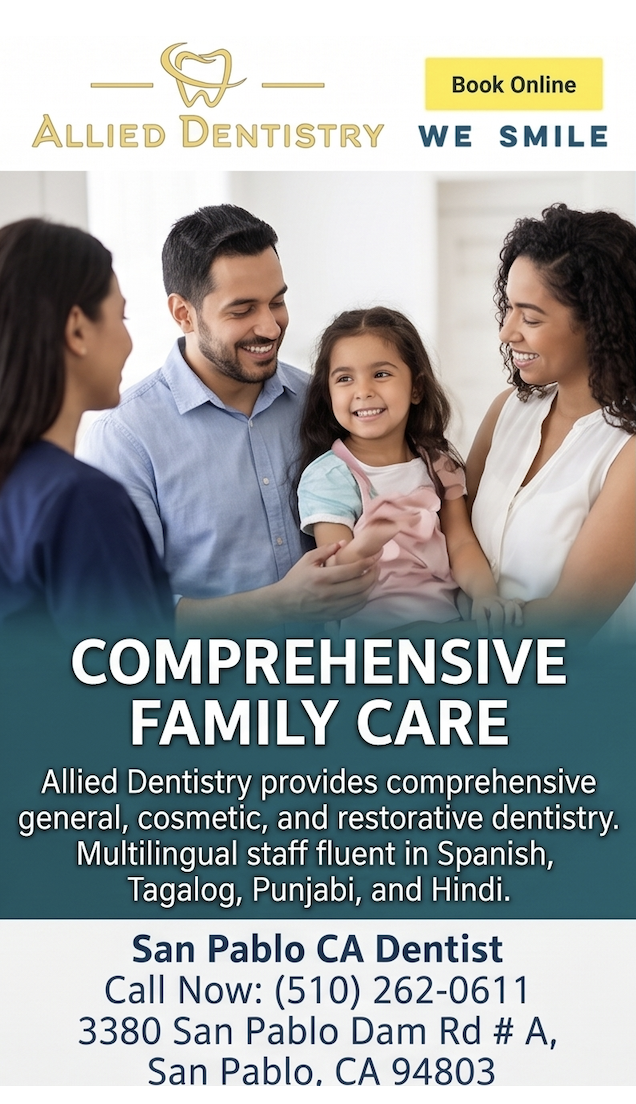
Welcome to Allied Dentistry, a family-owned dental practice proudly serving our community for over 30 years. Led by Dr. Birenderpal Sandhu, Dr. Tamara Lin, and Dr. Sukhdeep Sandhu, our office provides comprehensive dental care and routine exams for patients of all ages. We believe in evidence-based, patient-centered care, crafting individualized treatment plans to keep your family’s smiles healthy and bright. From toddler checkups to sudden dental emergencies, our compassionate team is here to provide the continuous, high-quality care you deserve. Schedule your family’s routine dental checkup or visit our emergency dentist in San Pablo, CA today by calling (510) 262-0611.
Dental Implants: Dental Implants & Emergency Dentist San Pablo CA | Tooth Replacement | Allied Dentistry
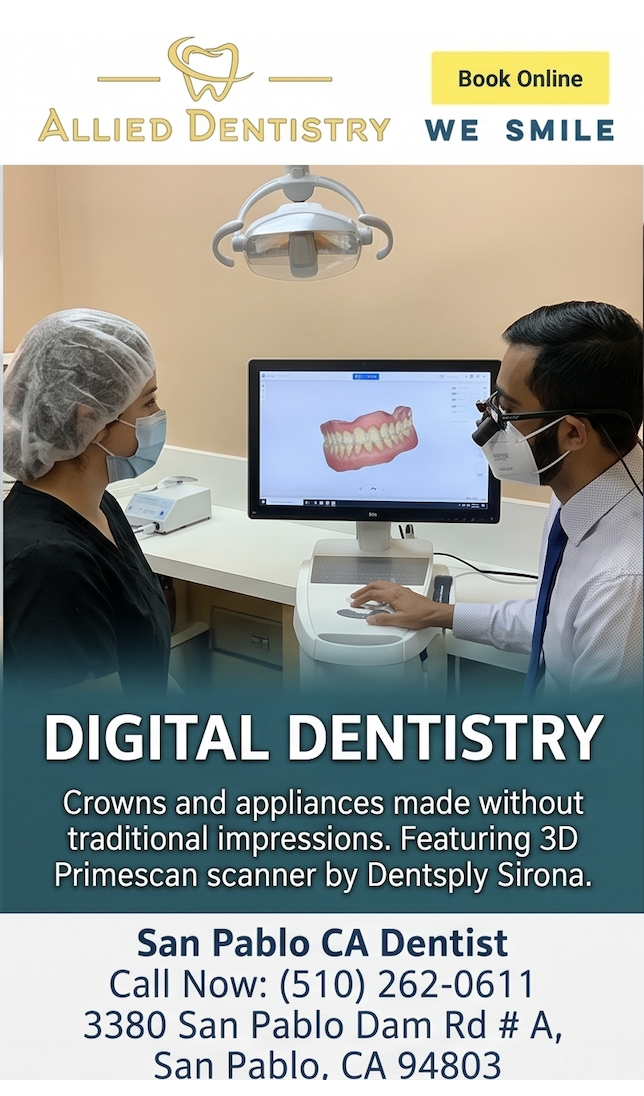
Say goodbye to messy traditional impressions and long waiting periods for permanent dental crowns. At Allied Dentistry, we use state-of-the-art digital dentistry, including the advanced Primescan 3D intraoral scanner by Dentsply Sirona, to capture highly accurate 3D images of your mouth instantly. This cutting-edge technology allows us to design and deliver precision-fitted restorations quickly. If you suffer a broken tooth or a lost filling, our emergency same-day crowns can rebuild your smile’s strength and beauty in a single visit. Experience advanced Primescan 3D tech at Allied Dentistry by calling (510) 262-0611 for urgent crown placement.
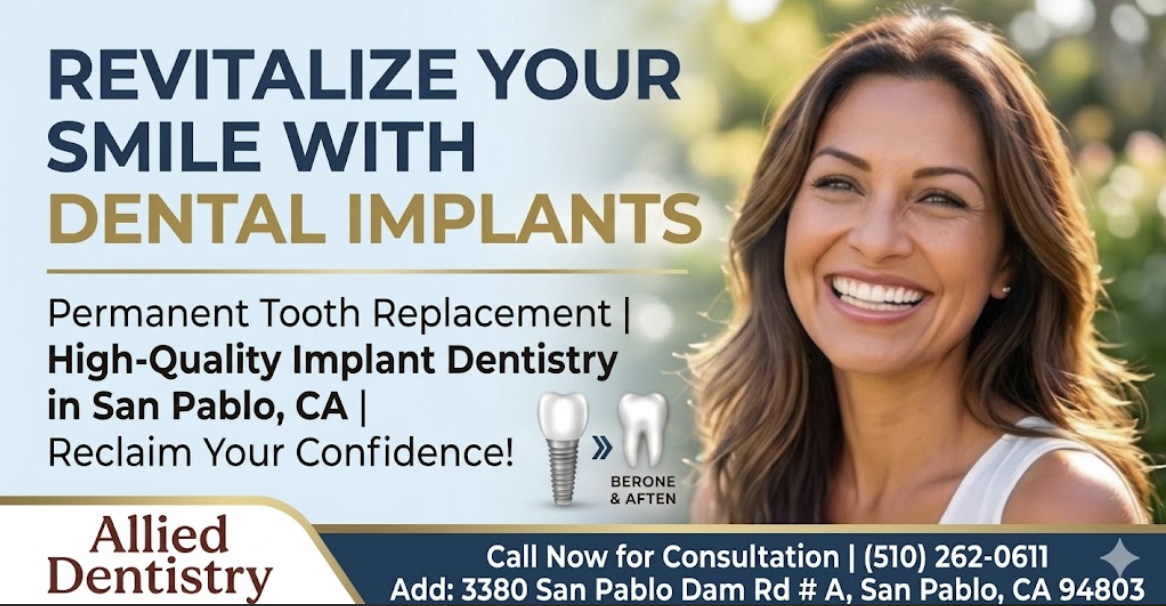
Dental Implants
Missing teeth can compromise your bite, alignment, and confidence. Reclaim a complete, permanent smile with high-quality implant dentistry at Allied Dentistry. We provide advanced, long-lasting tooth replacement solutions, including same-day dental implants and strategic bone graft placements in preparation for secure implant anchoring. Our durable, natural-looking implant crowns function just like real teeth. If you experience a broken implant crown or severe tooth loss requiring urgent attention, our emergency dentist team is ready to step in. Reclaim your missing teeth with structural dental implants—call our San Pablo office to book your consultation.
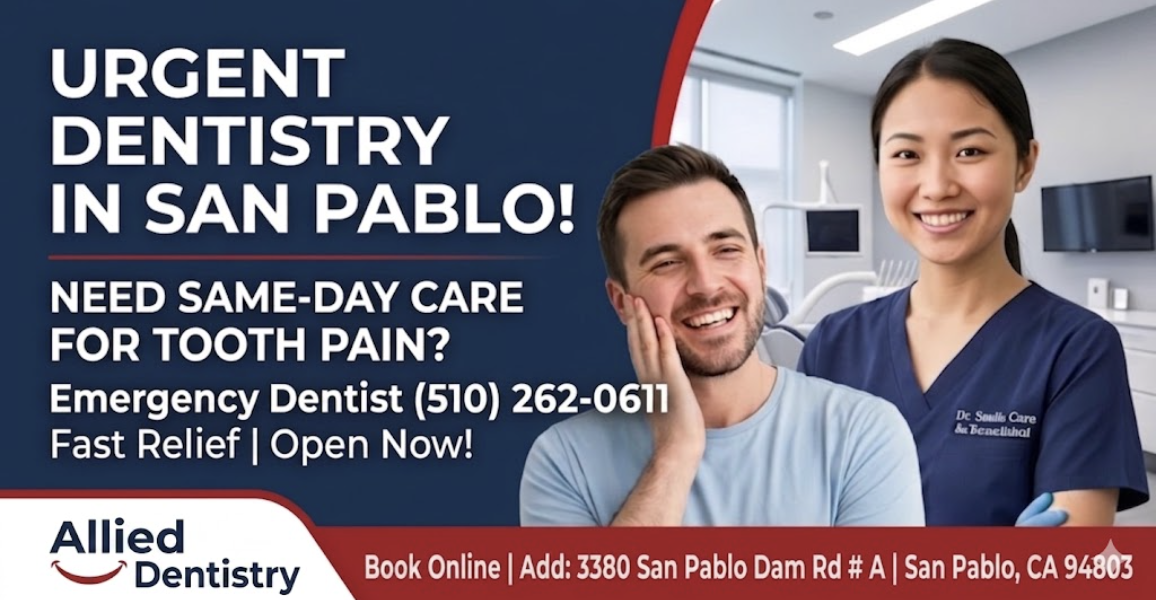
Emergency dental Care
A sudden dental emergency can be incredibly painful and stressful. Whether you are dealing with a severe toothache, an abscess, or oral trauma, Allied Dentistry provides prompt, dependable emergency care when you need it most. We prioritize urgent relief and pain care, opening up immediate slots to get you out of discomfort and safeguard your oral health. You don’t have to suffer through the pain alone. If you need an emergency dentist near me in San Pablo, CA, call (510) 262-0611 right now for immediate assistance—we are open Monday, Tuesday, Wednesday, Friday, and Saturday morning!
Invisalign: Invisalign & Emergency Dental Care Near Me | San Pablo CA | Allied Dentistry
Welcome to Allied Dentistry: Your Guide to Comprehensive Dental Care in San Pablo, CA
Are you looking for a dental home that truly puts your family’s needs first? For over 30 years, Allied Dentistry has been proud to serve the East Bay community as a family-owned practice. We believe in patient-centered care, combining evidence-based practices with modern digital dentistry to give you the best possible outcomes.
Whether you need a routine check-up, a complete smile makeover, or urgent care, our team is equipped to handle all your oral health needs. Here is a look at the premier services we offer to keep your smile healthy and bright.
Routine & Preventative Care for the Whole Family
Building a foundation of good oral health starts with regular visits. We prioritize patient education, ensuring you are involved in every decision regarding your treatment plan.
- Comprehensive Family Dentistry: 30+ Years in San Pablo CA
From baby teeth to mature smiles, we provide thorough dental exams, cleanings, and personalized care for patients of all ages. - Multilingual Family Dentist & Flexible Payments in San Pablo CA
We want dental care to be accessible to everyone. Our diverse staff is fluent in English, Spanish, Tagalog, Punjabi, and Hindi. Plus, we work with you to navigate insurance and offer flexible payment options to fit your budget.
Transform Your Look with Cosmetic Dentistry
Your smile is often the first thing people notice about you. If you are looking to enhance the aesthetics of your teeth, our cosmetic services can help you achieve the look you’ve always wanted.
- Complete Smile Makeovers & Veneers: Cosmetic Dentist San Pablo CA
Using advanced 3D intraoral scanners, we can help design a custom smile makeover, including porcelain veneers and tooth-colored fillings to correct chips, gaps, and discoloration. - Zoom Teeth Whitening: Brighten Your Smile in San Pablo CA
Need a brighter smile fast? We offer in-office Zoom Teeth Whitening in convenient 15-minute session increments, utilizing specialized UV light and bleaching gel for immediate, stunning results.
Discreet & Modern Orthodontics
You don’t always need traditional metal braces to achieve perfectly aligned teeth.
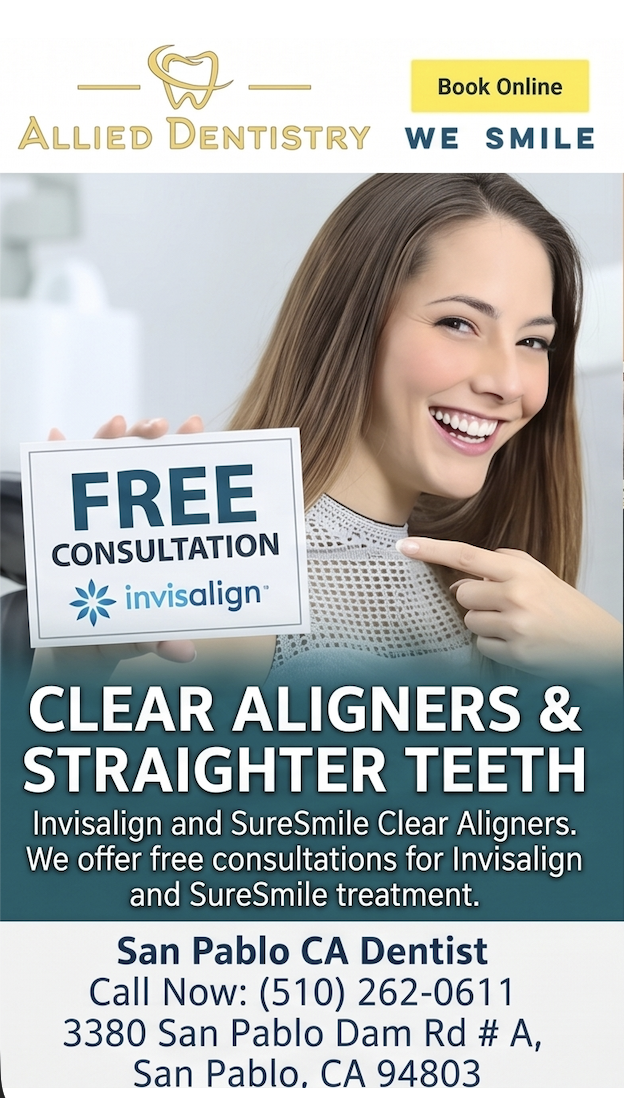
- Straighten Teeth with Invisalign & SureSmile Aligners in San Pablo CA
We offer industry-leading clear aligner systems, including Invisalign and SureSmile, to gently and discreetly shift your teeth into their proper positions. - Get a Straighter Smile: Free Invisalign Consultations in San Pablo, CA
Not sure if clear aligners are right for you? We offer completely free consultations to evaluate your smile and discuss your orthodontic options with no pressure.
Advanced Restorative Care & Specialists
When tooth loss, decay, or damage occurs, our specialized restorative treatments are designed to bring back the full function and comfort of your natural bite.
- Same-Day Implants & Bone Grafting: Expert Dentist San Pablo CA
Missing a tooth? We offer state-of-the-art dental implants, including same-day implant placement and bone grafting, topped with beautifully crafted custom crowns. - Prosthodontics & Restorative Dental Care in San Pablo CA
If you are suffering from clinical conditions associated with missing or deficient teeth, our prosthodontic solutions (including full and partial dentures) will rehabilitate your oral function and appearance. - Expert Endodontics & Root Canal Therapy in San Pablo CA
Don’t let tooth pain disrupt your life. Our expert endodontic care focuses on diagnosing and treating diseases of the dental pulp, offering comfortable root canal therapy to save your natural teeth whenever possible.
We Are Here When You Need Us Most
Dental emergencies rarely happen when it’s convenient. Whether it’s a severe toothache, a broken crown, or a knocked-out tooth, time is of the essence.
- Urgent Dental Care & Emergency Dentist in San Pablo CA
Our team is ready to step in when the unexpected happens. We provide prompt, compassionate emergency dental services to relieve your pain and protect your oral health.
Ready to prioritize your smile?
At Allied Dentistry, your oral health is our top priority. Contact us today at (510) 262-0611 or visit our office at 3380 San Pablo Dam Rd # A, San Pablo, CA 94803 to schedule your next appointment!
Welcome to Allied Dentistry in San Pablo, CA
Patient-Centered General Dentistry from a Family-Owned Practice
For over 30 years, Allied Dentistry has provided high-quality, evidence-based dental care to patients of all ages across the East Bay. As a family-owned practice, we prioritize your oral health by involving you in the decision-making process. We believe that exceptional care should be accessible and welcoming, which is why our diverse, dedicated team is proud to offer services in English, Spanish, Tagalog, Punjabi, and Hindi.
Whether you are here for a routine checkup or complex restorative work, our goal is to create a personalized treatment plan that keeps you smiling.
Our Comprehensive East Bay Dental Services
East Bay Emergency Dental Services: Fast Relief
Dental emergencies don’t wait for convenient hours. If you are experiencing severe pain, sudden injury, or swelling, our San Pablo clinic offers prompt, compassionate emergency dental care. We focus on diagnosing the issue quickly to provide fast relief and protect your long-term oral health.
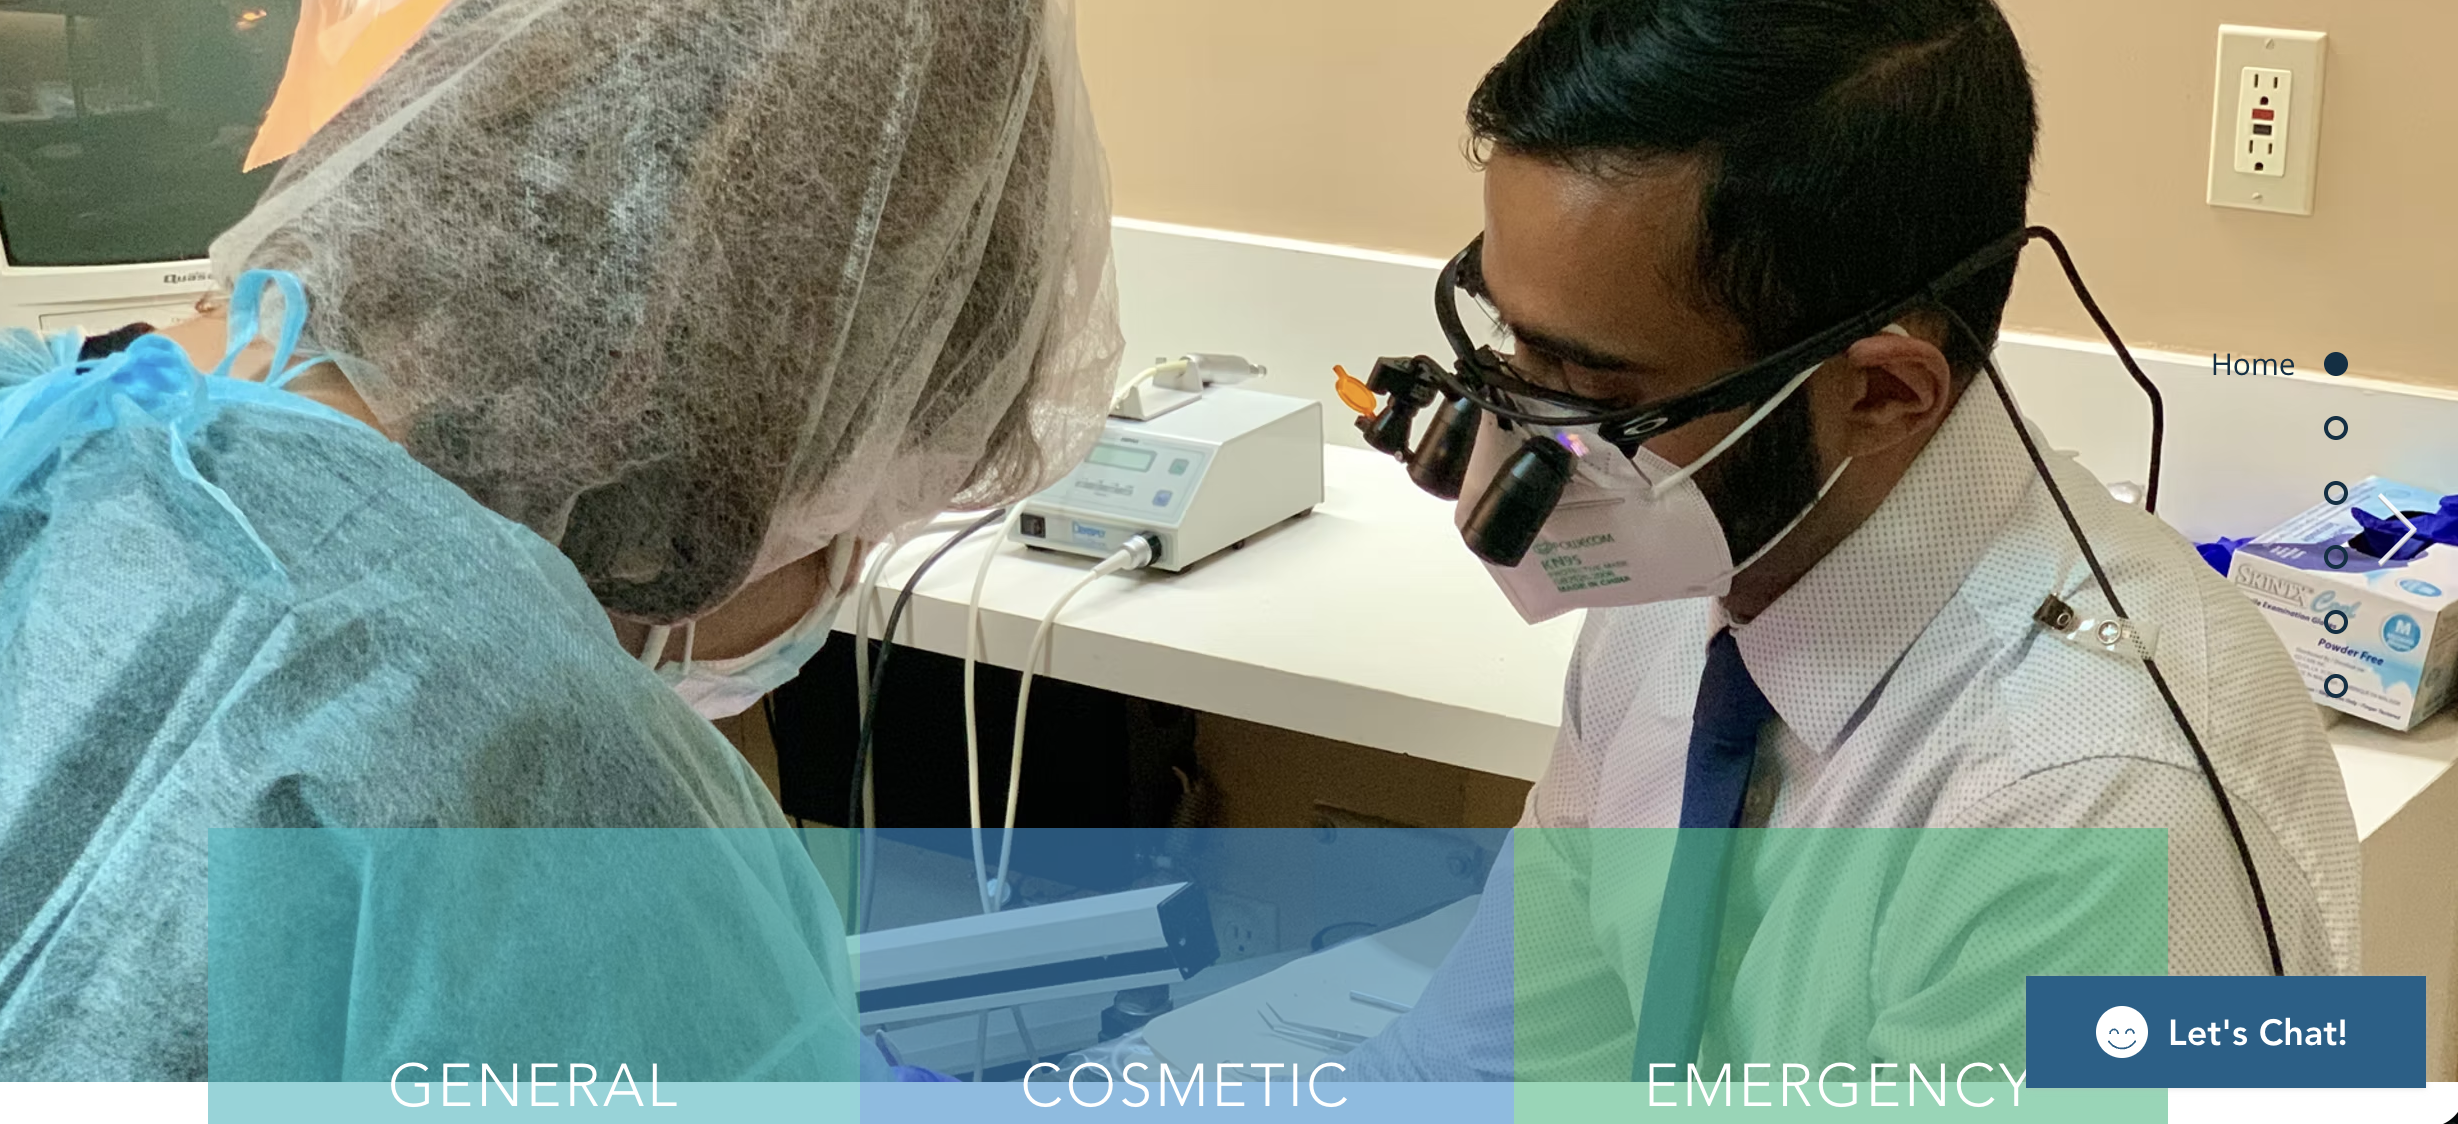
Digital Dentistry & 3D Primescan Crowns
Say goodbye to the discomfort of messy, traditional dental impressions. Allied Dentistry embraces the latest in modern technology. We utilize a state-of-the-art 3D Primescan intraoral scanner to digitally map your mouth with incredible precision. This allows us to design and fit custom crowns and other dental appliances faster and more comfortably than ever before.
Aesthetic Fillings & Cosmetic Dental Services
Your smile is one of your most important features. Our cosmetic dental services focus on improving the appearance of your teeth, gums, and overall smile. We offer everything from seamless aesthetic fillings that blend perfectly with your natural enamel to complete smile makeovers.
Professional UV Light Teeth Bleaching: Looking for a brighter smile? We offer highly effective teeth whitening performed in 15-minute increments using specialized UV light and professional-grade bleaching gel.
Orthodontics & Clear Aligner Treatment
Achieve a straighter smile without the hassle of traditional metal braces. We specialize in modern East Bay orthodontics designed to comfortably correct malocclusion (misaligned teeth) and bite issues. We offer custom clear aligner treatments—including free consultations—to help you reach your aesthetic goals discreetly.
Advanced Dental Pulp Treatment & Endodontic Therapy
When the inner tissue of a tooth becomes infected or damaged, you need expert care to save it. Our team is highly experienced in endodontic therapy, focusing on advanced dental pulp treatments to relieve pain and restore the health of your natural tooth safely and effectively.
Oral & Maxillofacial Surgery: Missing Tooth Replacements
If you are suffering from missing or severely deficient teeth, we provide comprehensive surgical and prosthodontic solutions to restore the function, comfort, and appearance of your smile. From bone grafting to surgical missing tooth replacements, we provide expert rehabilitative care right here in our San Pablo office.
Ready to prioritize your oral health? Contact our East Bay office today at (510) 262-0611 to schedule your appointment or free clear aligner consultation.
Serving San Pablo, CA, and the surrounding East Bay communities.
Multilingual Family Dentist & Flexible Payments in San Pablo CA | Allied Dentistry Near Me
Affordable Dental Insurance & PPO Dentist in El Sobrante CA | All Smiles Dental office near me
Pediatric dental Care
Setting a foundation for a lifetime of healthy smiles starts in childhood. At Allied Dentistry, we provide specialized, gentle pediatric care designed to make children feel safe, happy, and completely at ease in the dentist’s chair. Our team tracks your child’s dental development from their very first baby teeth through their teenage years. If your child breaks a tooth during sports or complains of an intense toothache, our fast-acting urgent kids’ dental care ensures they get pain-free treatment immediately. Keep your child’s teeth safe and comfortable by trusting our specialized pediatric & emergency dentist team in San Pablo, CA.
Periodontal Care
Healthy gums are the foundation of a healthy smile. Periodontal disease can sneak up silently, damaging the supporting structures and tissues around your teeth. Allied Dentistry provides specialized periodontal care focused on the prevention, precise diagnosis, and advanced treatment of gum disease. If you are experiencing sudden swelling, bleeding, or acute pain in your gums, don’t wait—our clinic offers emergency gum care and urgent treatment to halt infections before they cause permanent tooth and bone loss. Protect your gum health today and contact Allied Dentistry for comprehensive periodontal and urgent treatment.
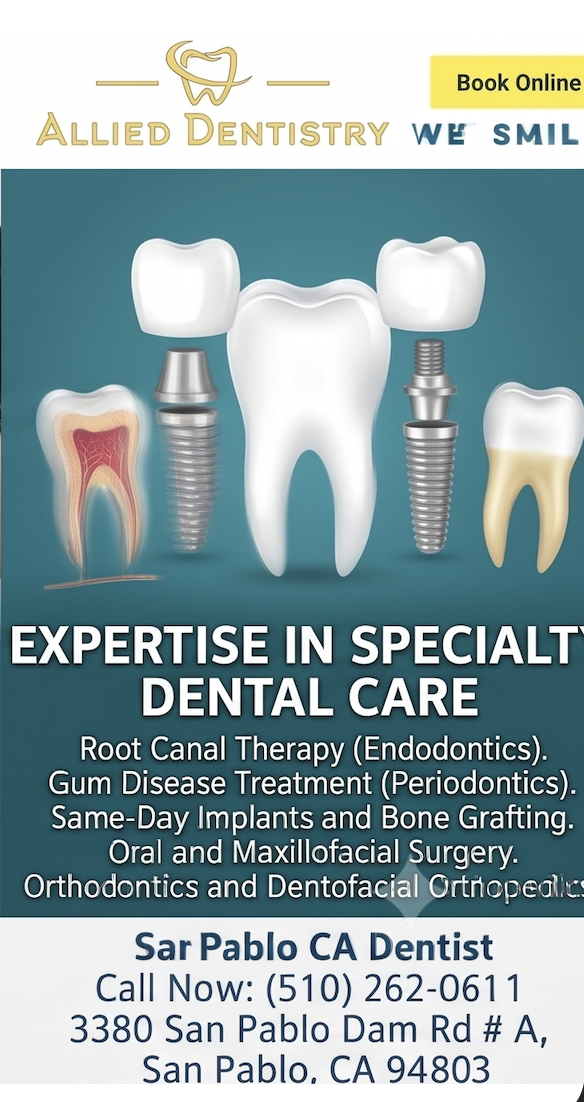
Root Canal
Deep dental decay or a sudden tooth fracture can expose the sensitive inner pulp of your tooth, causing intense, throbbing pain. A specialized endodontic procedure—commonly known as a root canal—is the most effective way to eliminate infection and save your natural tooth from extraction. At Allied Dentistry, our root canal therapy is designed to be comfortable and entirely pain-free. We provide rapid emergency root canals to target the source of the infection and deliver the immediate, urgent endodontics and pain relief you need to rest easy again. Stop agonizing tooth pain in its tracks and contact us for an emergency root canal in San Pablo, CA.
Multilingual Services
At Allied Dentistry, we believe that clear communication is essential for exceptional dental care—especially during an unexpected oral health crisis. We are proud to serve the highly diverse East Bay community as a true multilingual practice. To ensure you feel entirely understood and involved in your treatment decisions, our friendly, professional team is fluent in Spanish (Español), Tagalog, Punjabi, and Hindi. Whether you need routine preventative care or a multilingual emergency dentist for sudden pain relief, we speak your language. ¡Hablamos Español! We are here to support your family—visit us at 3380 San Pablo Dam Rd # A, San Pablo, CA 94803 or call (510) 262-0611. https://www.allied-dentistry.com/
Cosmetic Dentistry
Ready to revitalize your smile? At Allied Dentistry, our cosmetic dental treatments focus on enhancing the look, function, and aesthetic appeal of your teeth and gums. Whether you are looking for custom porcelain veneers to correct imperfections or advanced Zoom Teeth Whitening (offered in rapid, 15-minute UV light increments), we create custom paths to a confident smile. If you suffer an unexpected chip, crack, or cosmetic dental emergency, our skilled smile repair team is equipped to provide immediate cosmetic solutions to restore your appearance without delay. Contact your trusted cosmetic & emergency dentist in San Pablo, CA today for a smile repair consultation.
Invisalign
Achieve the straight, beautifully aligned smile you’ve always wanted without the hassle of metal braces. Allied Dentistry proudly offers Invisalign and SureSmile clear aligners as a comfortable, virtually invisible alternative for both teens and adults. We specialize in custom aligner therapies and even provide urgent emergency dental care near me for aligner issues, ensuring your treatment stays perfectly on track. We are currently offering Free Consultations for Invisalign and SureSmile clear aligner systems! Contact us at our San Pablo, CA office today to secure your evaluation.